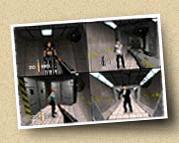
Multiplayer Scenarios
There are six different scenarios, each with different victory conditions, available
to test your skills, 007.
NORMAL
In the Normal scenario, you have a life bar just like during your missions. The object
here is to kill your opponents more often than they kill you. You can base the victory
conditions on time (most kills in 5, 10 or 20 minutes) or on kills (first to 5, 10
or 20 kills ).
YOU ONLY LIVE TWICE
In this scenario, each agent only lives twice, and the last agent standing wins.
You can't alter the Game Length in this scenario.
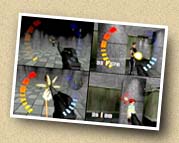
THE LIVING DAYLIGHTS
In this unusual scenario, the object is to locate the white flag token and try to
be the one to hold it the longest. The only catch is, when you're carrying the flag,
you can't use a weapon! You can set this game to last 5, 10, 20 or unlimited minutes.
The person holding the flag will show up on radar as a blue dot.
THE MAN WITH THE GOLDEN GUN
The Golden Gun becomes the deadliest weapon in the maze in this scenario. All other
weapons function normally, but the Golden Gun will eliminate your opponents with
a single hit. This confers a real advantage to the man or woman with the Golden Gun,
who will be marked on the radar with a blue dot. You can't change the Weapons option
in this scenario, and there is only one Golden Gun.
LICENSE TO KILL
One hit amounts to one kill in this scenario. You're sure to rack up even larger
body counts than usual in this one, 007. You can set the Game Length goal to 5, 10
or 20 kills, or to 5, 10, 20 or unlimited minutes.
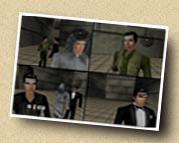
TEAM
There are a number of team scenarios where you can have equal teams, or where you
can form teams and hunt one person. Having three novice agents come after you if
you're an experienced veteran can be quite amusing! Different tactics are required
when you match teams of two against two.
Multiplayer Weapons
| Pistols |
Silenced PP7, DD44 Dostovei, Cougar Magnum |
| Throwing Knives |
Throwing Knives |
| Automatics |
Silenced PP7, DD44 Dostovei, Klobb, D5K Deutsche |
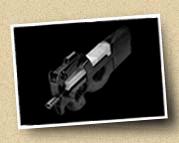
| Power Weapons |
DD44 Dostovei, RC-P90, Automatic Shotgun, Cougar
Magnum |
| Sniper Rifles |
DD44 Dostovei, Klobb, Sniper Rifle, Cougar Magnum |
| Grenades |
DD44 Dostovei, Klobb, KF7 Soviet, Grenades |
| Remote Mines |
PP7, ZMG (9mm), AR33 Assault Rifle, Remote Mines |
| Grenade Launchers |
DD44 Dostovei, Klobb, KF7 Soviet, Grenade Launcher |
| Timed Mines |
PP7, ZMG (9mm), AR33, Timed Mines |
| Proximity Mines |
PP7, ZMG (9mm), AR33, Proximity Mines |
| Rockets |
DD44 Dostovei, Klobb, KF7 Soviet, Rocket Launcher |
| Lasers |
DD44 Dostovei, Klobb, KF7 Soviet, Military Laser |
| Golden Gun |
Silenced PP7, DD44 Dostovei, Klobb, KF7 Soviet,
Golden Gun |
| Slappers Only! |
No firearms allowed! |
Multiplayer Awards
Double Kill: You killed two people with one attack.
Triple Kill: Very rare: you claimed three lives with one shot.
Quadruple Kill: Congratulations, you killed everybody (including yourself)!
Shortest Innings: You died quickly after starting.
Longest Innings: Exactly the opposite of shortest innings: you lived a long time.
Most Professional: You used head shots and other Bond-like tactics.
Most Honorable: You didn't shoot unarmed players or cheap kill tricks.
Most Deadly: You killed the most people.
Most Frantic: You kept moving and ran like a chicken a lot.
Marksmanship Award: Accuracy was your specialty.
AC-10 Award: Opponents had trouble hitting you.
Where's the ammo?:You didn't pick up much ammo.
Where's the armor?:You didn't pick up much armor.
Most Dishonorable: You employed cheap kill strategies and hit unarmed players.
Most Cowardly: You camped stayed away from the action.
Mostly Harmless: You had trouble killing anyone completely.
Lemming Award: Like the creatures, you committed suicide.
Level Starting Points
Because I'm really lazy, I'm only going to give level advice on my favorite
levels.
Facility
1. Vent
2. The blue room with the green hallway next to it. There are no doors
for this room.
3. The gray room-you're in between two automatic doors and there's
bullet proof glass too.
4. The blue room but this time there's one door and there are two guns
(or four ammo boxes) in that room.
5. At the base of the stairs, just below the small balcony.
6. Behind the double doors upstairs. If you go through the double
doors, you'll see get a gun. To the right is the door for the bathroom.
7. The bottling room. At the base of the stairs. If you go up the
stairs, you'll get a gun.
8. The pillar room. It's the room after start point number 3 but
before the long hallway. The door that opens to the long hallway is a
quick opening automatic door-the only one on the level. Just before
that is the start point.
Complex
1. Hole in the ground. This room has a hole in the ground and has two
sniper points to it. Where the Golden Gun would be.
2. This start point is in between two ramps. Referring to the previous
start point, if you were to look straight out and look down a little,
you could see that start point (but you can't see them start there in a
multiplayer game because you're too close).
3. Top of the red fence. At this start point, there's a false wall
near you and a gun in your proximity. Like I said, TOP of the fence.
4. Da V-Spot. At the very tip of the V-Spot is a start point. A false
vent is there and if you were to go up the ramp, a gun awaits you.
5. The balcony room. In this room, there's a big balcony. If you were
to be standing at the top of the balcony and look to the left a little,
that corner is where you would start. There are three ways to access
this room. Also down below in this room is where the best gun is
located
6. Bottom of the red fence area. At this start point, you'll be in a
corner, not very far from start point number three. You'll be at the
bottom of the ramp.
7. Red room. I personally call it the "Red Body Armor" because the
room is red and in the corner there is some body armor kicking it there.
Stack: All are on the ground level!
1. Big room, in the corner by 2 doors that has no ammo box near it.
2. The Corner facing the ramp that goes upstairts, by the body armor upstairs.
3. Corner looking out towards a secret passage, there's glass, and it looks at one of the basement entrances. The spot is very close to #2.
4. Very middle of large rectangular room that has the upstairs sniper's nest.
5. Just about on top of the weapon in a room with a ramp. That room has the choice weapon, and is near the sniper's nest.
|